Customizing the log input line is carried out in two steps. The process starts with configuring the field arrangement. In a second step the user can assign field properties to every field individually.
This paragraph describes the first step towards customizing the log input line by arranging the log input fields such as to best fit the user´s operational needs.
A right mouse key click on any field of the loginput line opens a sub menu. Selecting its first item "Configure Inputline" will open the control box for this operation.
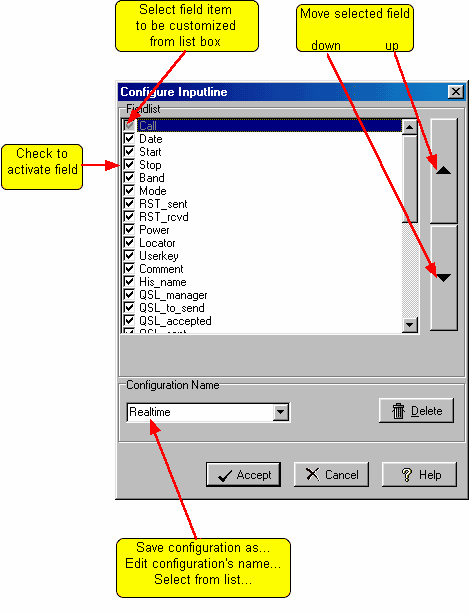
This is what appears and how to operate its controls:

Figure 191: Configuring the loginput line
When you have finished making changes click the Accept button to save your modifications under the selected name or click the Cancel button to leave the frame without making permanent changes. Clicking the Delete button will display a dialogue on whether you really want to delete the selected configuration and remove its name from the list.
To create a new configuration you may start from any of the defaults, making field arrangements according to your needs and finally edit the selected name to whatever makes sense to you. Click Accept in order to save the new configuration under this name. Your customized log
input line will immediately be activated.
Every selected input field will automatically appear with its caption on the log input line.
Active COMMANDS:
None, there is only mouse action and editing from keyboard in this frame
BUTTONS:
| Accept | Accepts inputs and leaves frame. |
| Apply | Puts changes into action immediately. |
| Cancel | Cancels all changes if not in action yet and leaves frame. |
| Help | Opens (this) help window. |
This topic was last edited on Thursday, 12-Dec-2024, at 13:30