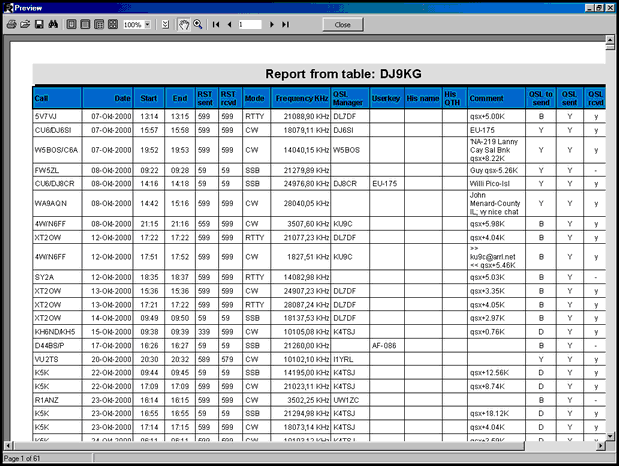
Every print job started from where ever in TurboLog 4 will pass the Print Preview screen. Although the data content of a print job cannot be altered on the preview screen there are numerous highly useful adjustments which can be applied. Primary goal is to prevent you from wasting paper and ink and by this saving money and time. Among the useful features for example is to control whether you want to print landscape or portrait and to adapt the data to the various paper sizes available in different countries. Thus, before the Print Preview screen itself opens the printer setup is called in order to allow you to select a printer, page size, page orientation and the like:
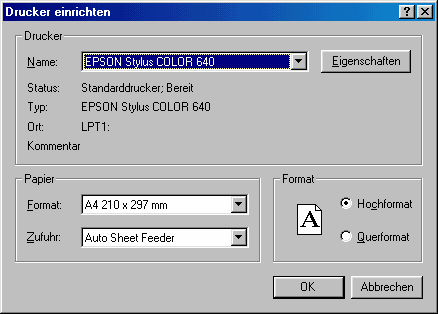
Figure 363: Printer Setup
Of course this control box shows up in your own language since it is created by the customized WINDOWS operating system. Click the OK button after you have completed your inputs. This will immediately bring the Print Preview page to screen:
Since we know from where the print job was started a suitable print template is automatically selected and filled with the data. The print templates are created by means of the Print Report Designer. While the job is computed it can be aborted at any time by pressing the Cancel button. There may be just a small delay before the first data is visible. Progress in preparing large jobs for the printer can be monitored by the page count which is displayed in the bottom left corner.
If you realize you accidentally chose an inadequate page layout you can still abort the job by pressing the Close button on the page control bar. If you are happy with the layout you simply click the printer icon in order to initiate printing. This will pop up the following Print output control box:
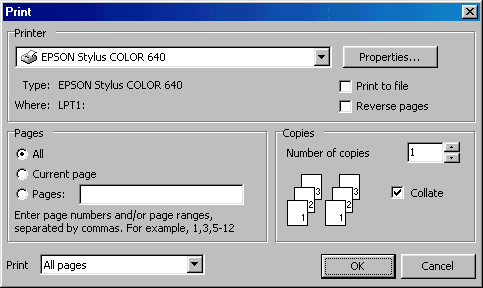
Figure 365: Printer Output Control
This box offers a couple of very useful features. Now, after you have realized how many pages your print job has generated you may wish to print a subset only. This is the place to select distinct pages or ranges of pages for printing. Furthermore, you could now select a different printer device such as FINE PRINT 2000, for example. This piece of software emulates the real printer selected earlier. The virtual software device, however, allows you to print multiple pages on just one sheet of paper and thus helps again in saving money. In addition to these features you can also enter the number of copies and select reverse page printing. Pressing the OK button on the control box will finally start the real print.
Please note:
If you want to get rid of the printer dialogues and/or like to assign a printer as fixed to a report you may proceed to the topic on Report Specific Printer Control.
The tool bar of the print preview screen allows the user to control the print job in various ways. Every tool icon is equipped with a tool tip which pops up on mouse over. The following control icons and groups of controls are available on the control bar:

Figure 366: Print Preview Control Bar
The icons denote the following operations ( from left to right ):
File controls:
![]()
Clicking this Print icon will initiate printing.
![]()
Clicking this Open File icon will pop up the file select box. You can select a file for import to open.
![]()
Clicking this Save icon will pop up the file select box in order to let you save a print job for later processing or other purposes.
![]()
This is the Export icon. Clicking this icon will transform and export the data into the following formats:
Text file export ( ASCII )
EXCEL
HTML
Select as appropriate for your purposes. Before the data is exported you can apply export related alignments, such as selected pages, a range of pages and data formats in the following box:
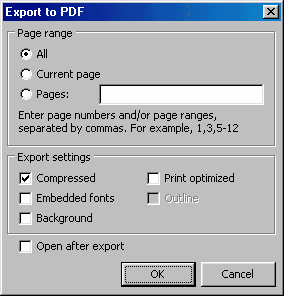
Figure 367: Exporting
After you have completed your entries and left this box the standard file select box will pop up in order to let you select a suitable file name and folder in which to store the export.
Please note:
In order to receive a meaningful output on export operations the header of the print preview template must be as simple as possible. Weird results may be obtained on EXCEL exports due to multiple rows of header information. Thus, exports should only be started from the Export Buttons in TurboLog 4's data grid screens. This assures automatically loading of a special export template into the Preview Page.
![]()
This is the Find Text icon. Clicking it will open the following dialogue box:
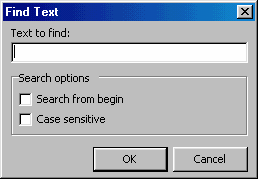
Figure 368: Find Text
This feature allows you to search for text on the Print Preview pages. Make your entries as applicable and start the search by clicking the OK button or click Cancel to leave the box.
Size controls:
![]()
This is the Whole Page icon.
![]()
This is the Page Width icon.
![]()
This is the 100% icon.
![]()
This is the Two Pages icon. It places two pages on one sheet.
![]()
This is the Manual Zoom control.
Page control:
![]()
This is the Page Margins icon. Clicking the icon will pop up the following control box. It allows you to adjust your print job with respect to paper size, orientation and margins.
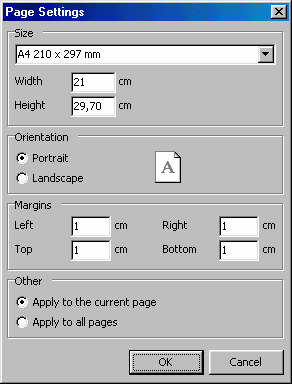
Figure 369: Page Settings
Make your entries as applicable and click the OK button to let your alignments become effective or click Cancel to leave the box with no effect.
Page navigation:
![]()
This bloc of icons allows to navigate through the pages of a print job as follows ( from left to right ):
First Page,
Prior Page,
Page Number on display ,
Next Page,
Last Page.
Screen control:

The Close button aborts the print job and closes the print preview screen.
Please note:
Printing icons like those used for the DXCC listings requires considerable internal graphic resources in terms of memory. Older machines with memory of less than 256 MB and those running under W-98 may run out of memory if large print jobs are loaded and a lot of scrolling or page size operations take place. If your machine belongs to this category: Please refrain from these operations if you realize your screen reacts "viscuously". Modern machines will not see these performance problems.
Active COMMANDS:
CLICKABLES:
| LEFT KEY CLICK | Selects/highlights icon, starts operation. |
BUTTONS:
| CLOSE | Closes print preview page. |
| CANCEL | Aborts print job or control boxes. |
| OK | Puts entries in effect, closes input control boxes. |
This topic was last edited on Thursday, 12-Dec-2024, at 13:30
